
1. Login
Go to logchecker.com.au, enter your username and password and click login.

2. Add Your BFM information
If you are BFM accredited, click on the “Settings” button on the main menu. Then Click on “Accreditation”. If you’re not BFM accredited, skip this step.
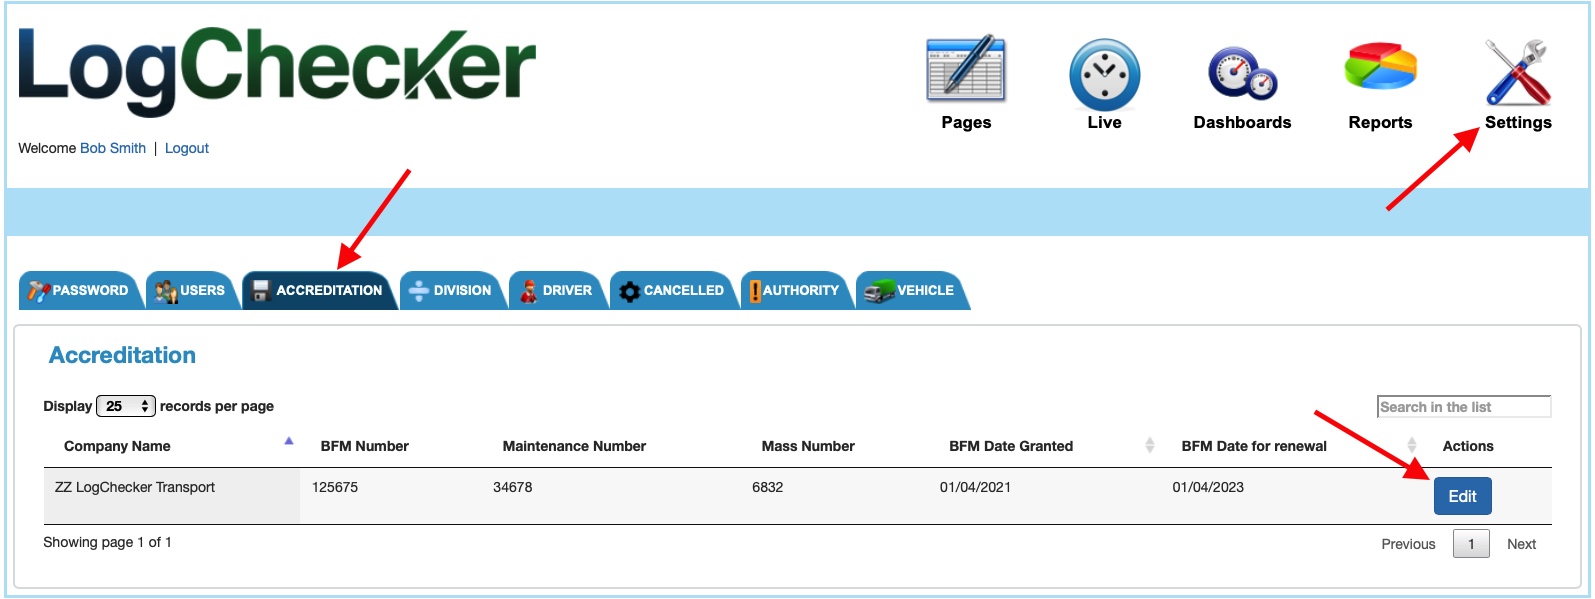
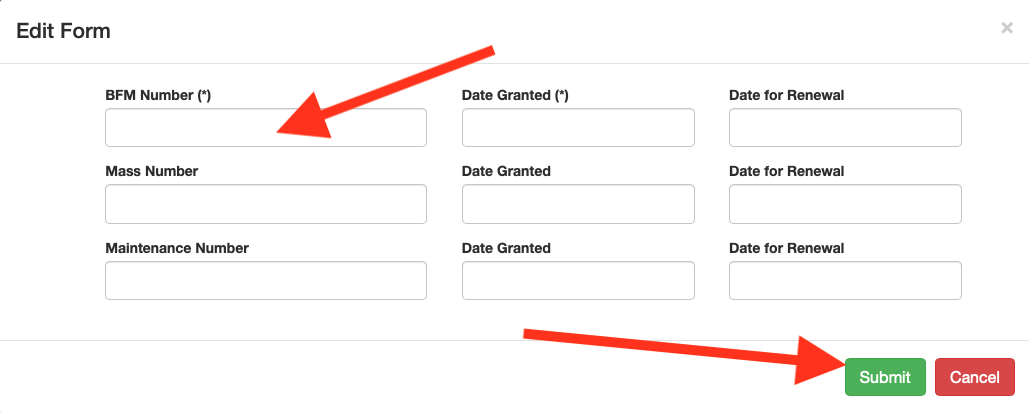
Click “Edit”, and enter your accreditation information, and click “Submit” before continuing.
3. Add at least 1 Division
LogChecker requires at least 1 division. Click on the “Division” tab, and then click “Add New”. (Consider separating your drivers into at least two Divisions Standard & BFM (or WAHVA). This will allow you to report on your BFM drivers for NHVAS or WAHVA accreditation reports).
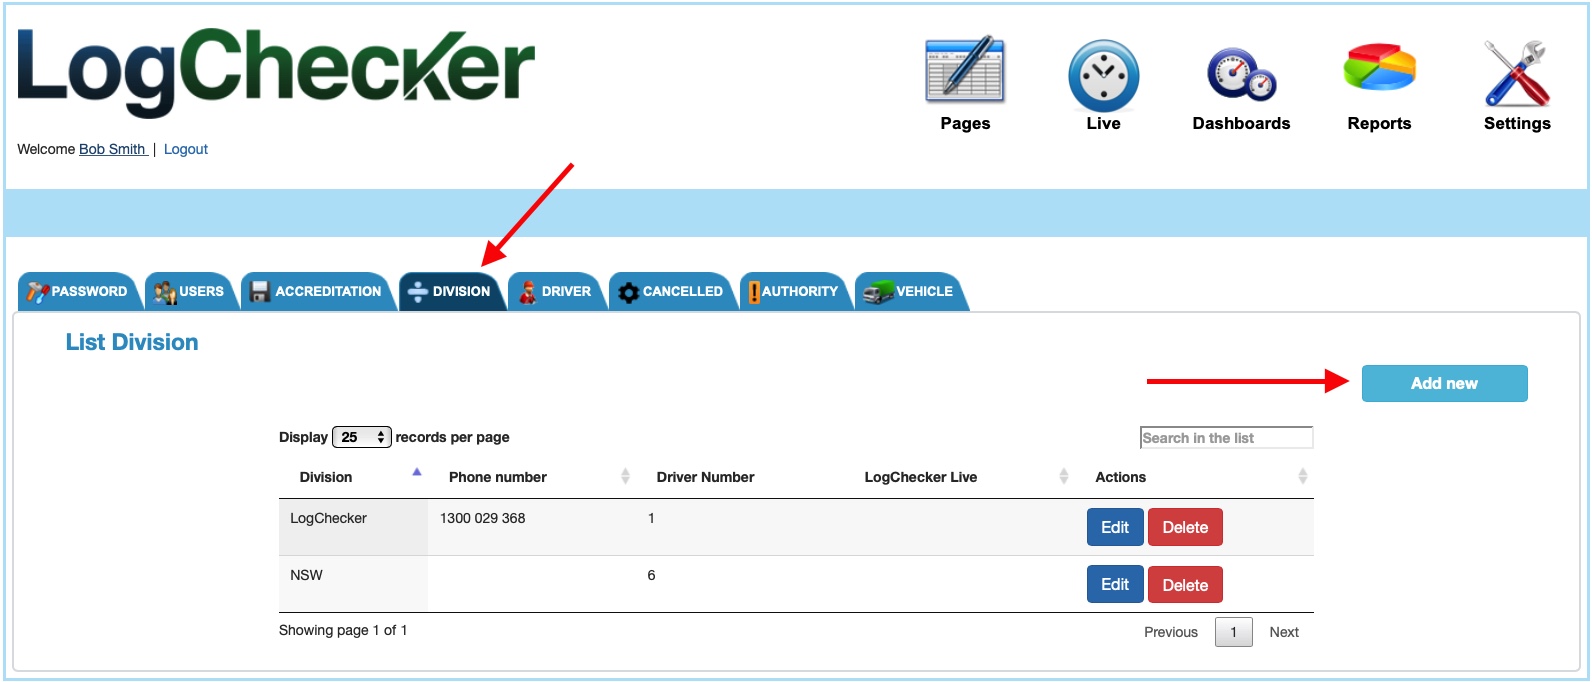
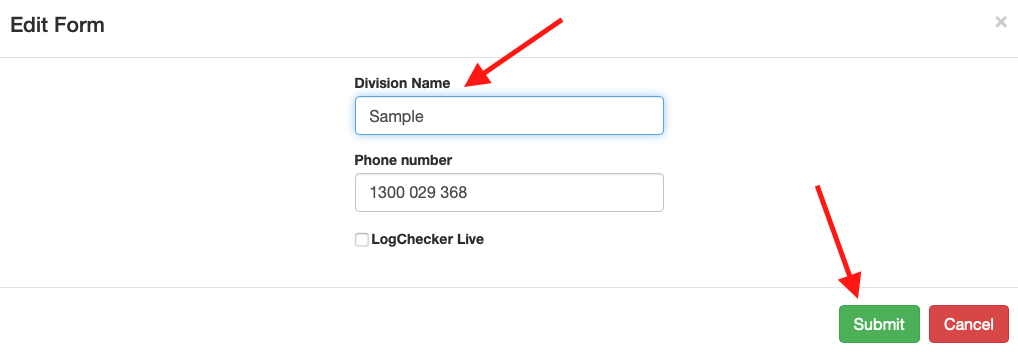
Once the popup appears, enter your Division name, and click “Submit” before continuing.
You may add as many divisions as required. These groupings allow you to separate drivers into Depots, States, LogChecker Live Users or Standard & BFM.
These divisions may be used a a filter when running reports.
4. Add Drivers
Click on the “Driver” tab, and then click “Add New” to enter a driver into LogChecker.
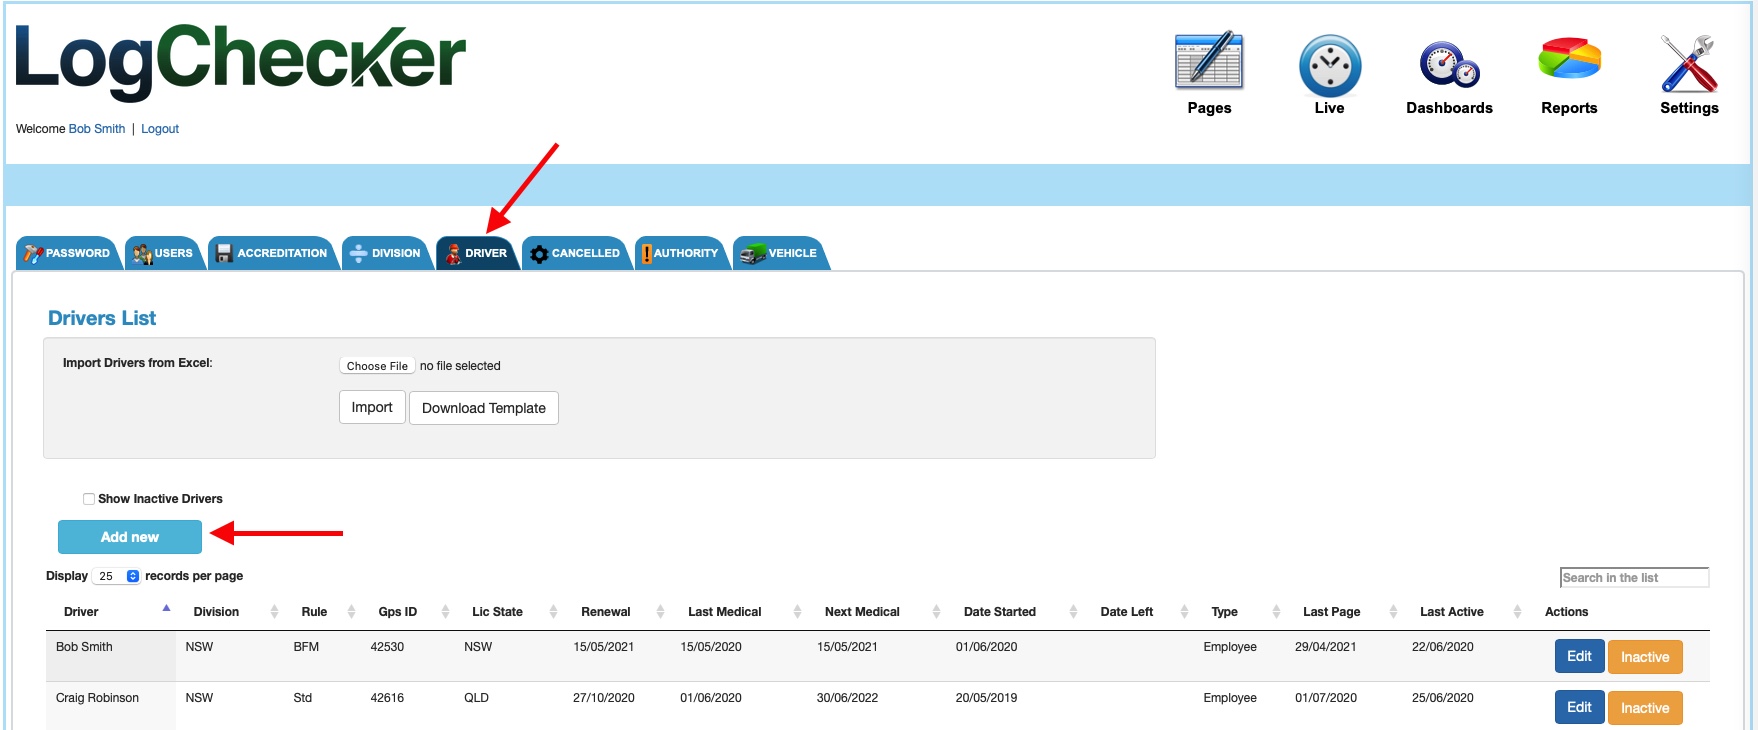
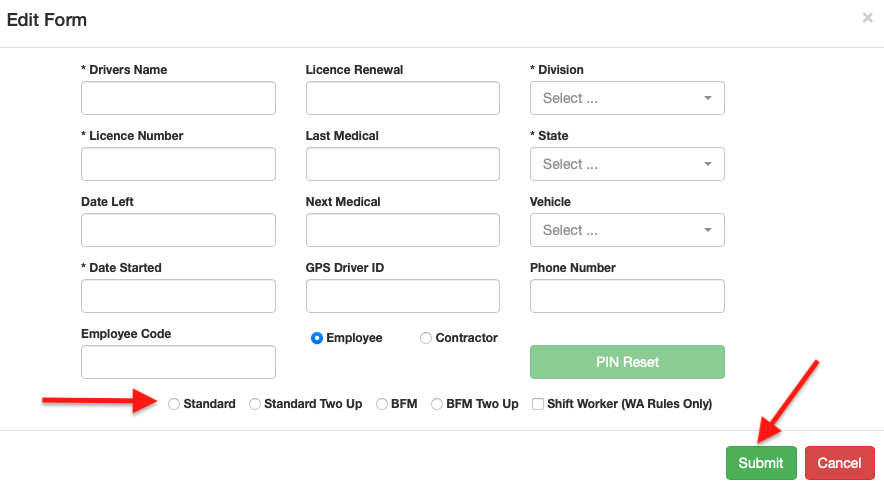
Fields marked with a (*) are mandatory and must be completed.
Once all information has been filled, and a ruleset selected, click “Submit”.
You may add as many drivers as required into the system.
5. Medical & Licence Reminders
Medicals and Licence Expirations will appear on the Dashboard.
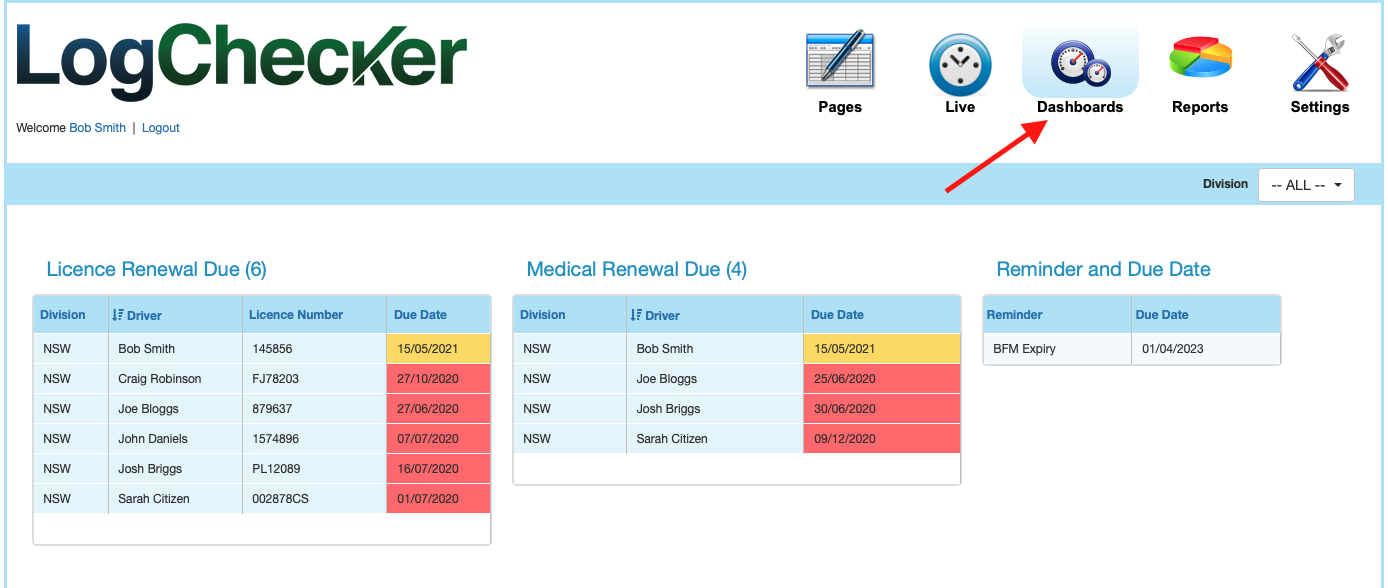
Medicals and Licence expirations will turn Yellow when due in 30 days or less and Red when due in 10 days or less.
6. Start entering Pages!
Click on the “Pages” button.
Click on “Select Driver”. When prompted, choose the division, then the driver and the date of the Diary page to be entered. Click OK to continue.
Click & Drag work hours.
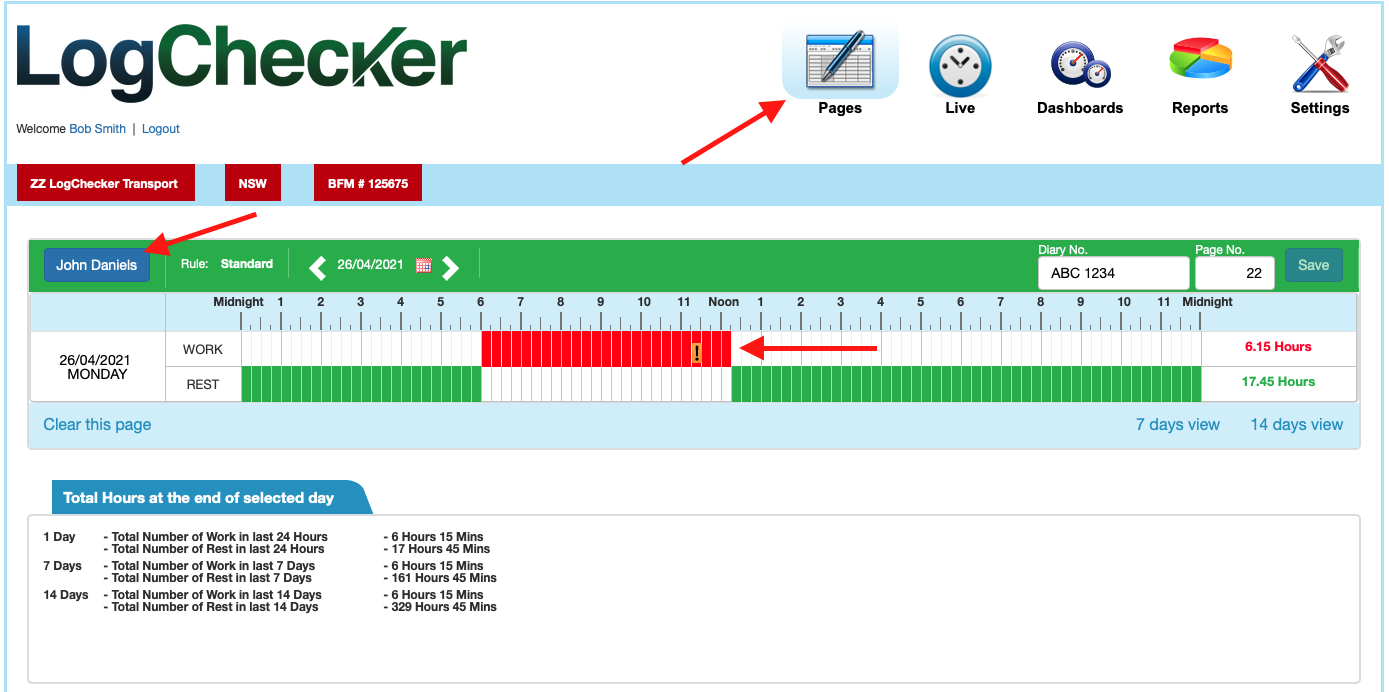
When you’ve entered all work hours, click save. LogChecker will identify any breaches (or warnings).
If you make a mistake, simply correct it and click save again.